The Building of the “Tiny Shop”
In June 2020, we moved back to our home province of BC, to be closer to family during the pandemic, and we purchased a house. What we found in the basement after the sale turned into something strange and wonderful that continues to give back.

.
Hey, what’s behind that door? Probably a closet, right? This small hatch under the bottom of the house was never mentioned by the realtor when we toured the house, and we thought it was just a storage closet.

This small door, made with boards left over from the deck, lead to a space much larger than we thought.

The hobbit door (right) lead into this little narrow space, lined with chipboard.

The room continued down a little hallway, divided into two small but covered areas, with shelves.
The little secret room had holes in the floors, no windows and a 6’ ceiling, and was full of spiders. However, for a short woman who loves spiders and needed a covered space, it was perfect. I was so grateful to find this bonus space, enclosed from the elements, and set out to make it into a useable workshop for woodworking and resin in the winter.
I challenged myself to avoid buying anything new for the shop, to make it as sustainable as possible. Whenever I could, I used scrap wood, thrift store finds, discarded furniture or pallets I found on the side of the road.
The First Phase

After moving in, I started by cleaning up the space with a shop vac, carefully moving the spiders outdoors, and sanding the rough surfaces. I found some old paint under the house, and painted the chipboard walls white and the floor a light blue to brighten the space.

I removed these shelves, which were holding old building supplies, and repurposed the pieces of plywood to build work surfaces and wall shelves. I added a dust collection system, ventilation for my resin work, LED lighting and more outlets.

The first iteration of the shop complete! I used it like this for the first year to learn where the sawdust went, and what parts I wanted to modify with the storage. Having items behind the saw made them too dusty, and it was hard to clean the floor with everything on it.
The Second Phase - Redoing the Wood Shop
In summer 2022, I had enough experience with the shop to know what I wanted, where the sawdust tended to accumulate, and what would work. I removed the work counters and reorganized the cords and lighting. I took down all the tools from the wall and painted it with blue clouds, using some paint I found in the basement.

Sanding and patching the wall for painting, and rethinking how to organize tools.

The blue sky makes the windowless space feel more open. I began adding pieces of a cut up pallet to the ceiling beams to make storage space for sorting wood scraps.

I mounted the garbage and rag bins under the workbench to keep sawdust out, and make it easier to sweep.

I patched holes in the floor, and installed vinyl plank flooring over the plywood. The walls aren’t straight so installation was a challenge!

My interim scrap wood pile on the left as I install the floor. This cozy woodworking area is approximately 60 sf, and for the first time in my life I’m glad not to be taller.

Much better with the new floor! I added some scrap pieces of baseboard that I found under the house, and it tidied up the uneven edges. It will be much easier to vacuum sawdust now. The mirrored cabinet in the back was something I found on the side of the road.

I used my band saw to make this little rack for my clamps, out of a piece of shelving I found for $1 at the local thrift store.

I added some mirror tiles from IKEA to open up the space and let me see the back of pieces I’m working on. I installed some dollar store magnetic knife bars to hold small metal items like drill bits, while I build more storage.

It’s looking better already! Next step is to tackle the dust collection and wood storage, and replace the bench top.
Cutting the Hatch and adding dust collection

I realized I could add a lot of storage space and reroute my dust collection if I cut a hatch into the other side of the wall, and put shelves along the back side. Here’s my hole drawn onto the wall, for the hatch door between two studs.

Halfway done… My kids didn’t believe me when I told them I was going to cut a hole in the wall! This is the chipboard back of the wall, with empty space in between, halfway through the cut.
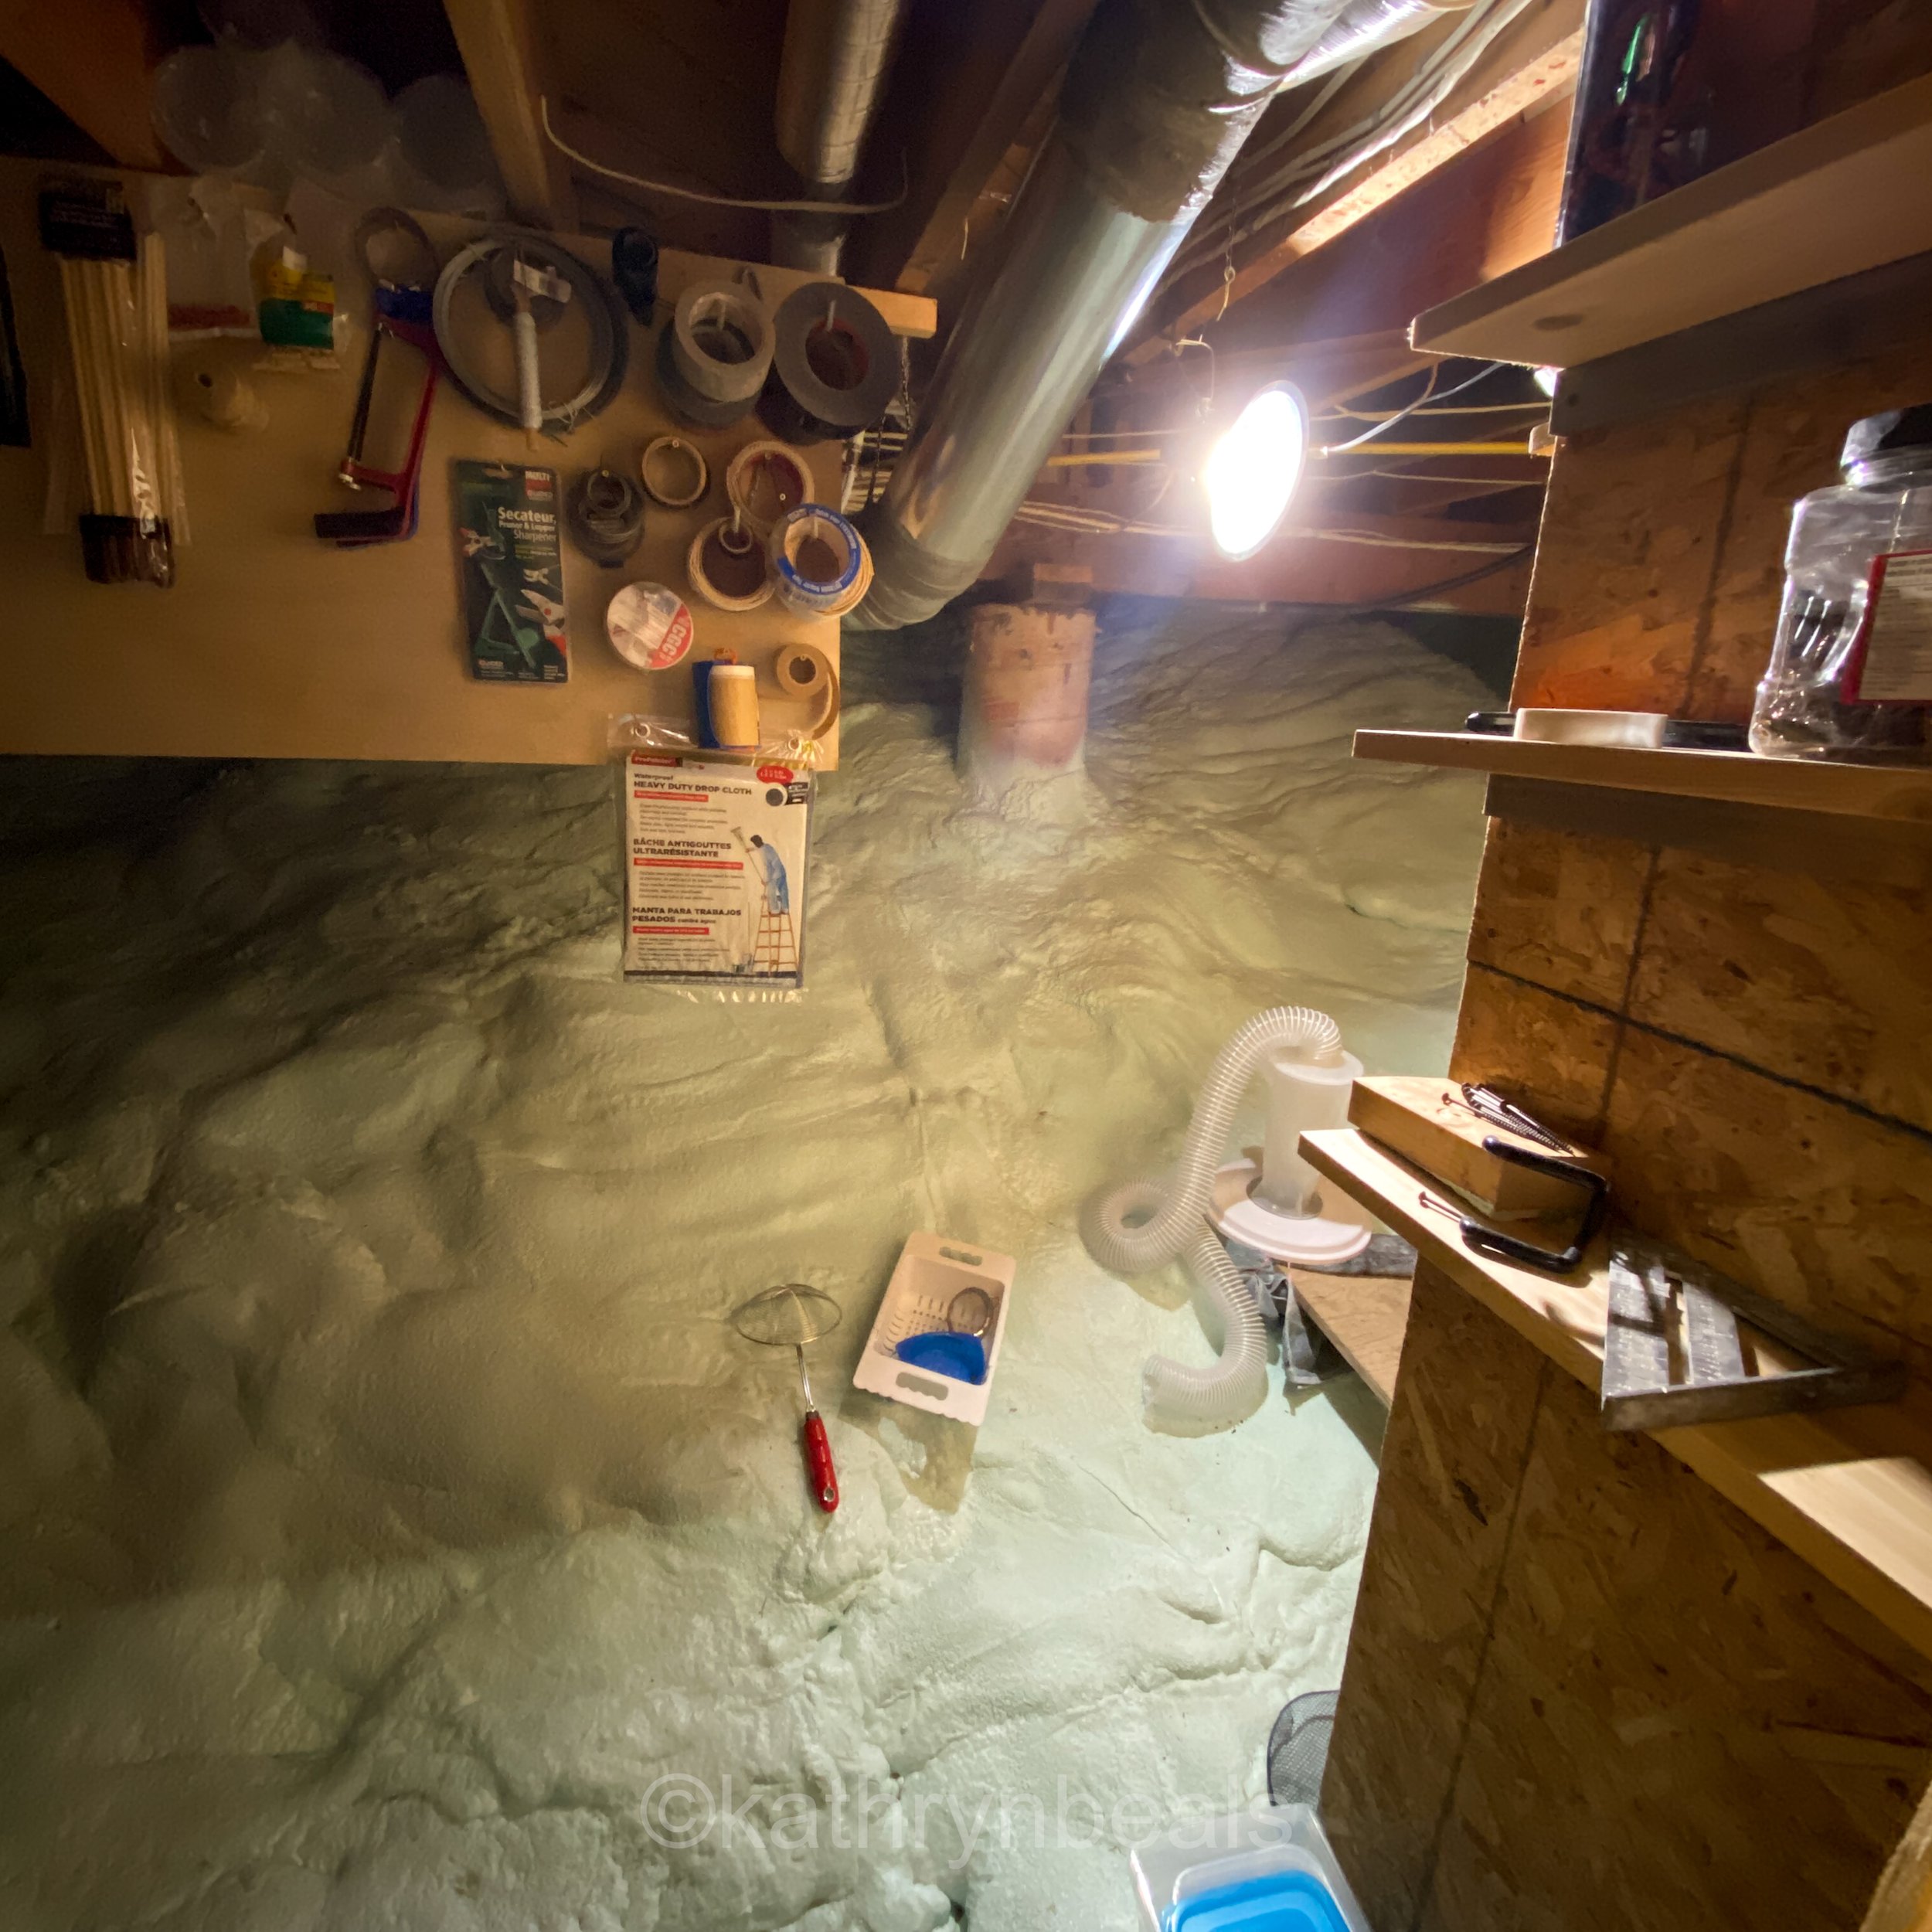
Success! I added some shelves and a hanging storage area behind the wall. The white foam insulation covers a large boulder that the house is built around. The shelves can hold extra tape and supplies so they don’t have to be stored in the main work area.

Back on the shop side of the wall - I cut some more holes and added some little recessed shelves to hold my screws, hardware and finishes. I found an old cupboard door tucked away somewhere, and put it as a temporary door to my secret hatch. The containers on the top shelf are ones that used to hold parmesan cheese.

Back inside the mystery hatch, I added shelves for my frames and an area for my shop vac. The hoses lead to the other side of the wall to collect dust from my tools.
Removing dust efficiently while I work is safer for my lungs, and having the vacuum on the other side of the wall cuts down on noise a lot.

The hoses go through a hole in the wall to little gates which can open and close, directing the dust removal between my different saws and sander. This one is angled so I can reach it while I’m using my mitre saw.

This central port can be disconnected from the wall, so I can vacuum sawdust off my shop bench or connect a tool I don’t use often.

I cut up some old PVC pipe that I found on a beach, and made it into tool holders. The cheery rainbow and cloud design brightens up the small space.

Some old siding I found makes a neat and tidy ceiling, and leftover vinyl floor tile makes a durable workbench. To be continued…
The Painting and Resin Side

This side had chipboard walls and floor, and I had been using old rugs to absorb the resin drips, but I decided to upgrade this side as well and make it cozy for winter.

I found some discarded house paint, and began painting clouds on this side. It opens up the space so much already, and it’s easy to make touch ups as needed.

I removed my workbench and painted the walls, in preparation to add carpeting. The foam underlay evens out the floor for the next step.

More paint and mirrors open up the tiny room. I’m removing the old contact paper on the workbench.

Adding the leftover flooring to the workbench top, and more tool holders made out of piping. The square stick holders are cut up legs from an IKEA coffee table.

The other workbench gets a makeover too. The curtain came from the local thrift store, and hides the trash can and air purifier. The black shelves are salvaged wood from old garden stakes, sanded and painted.

Paint holders made from old baseboards, painted in rainbow colours for fun.

Mixed carpet tiles can be replaced as needed. The baking rack holds my curing resin and can be covered with plastic covers to keep dust out.
To Be Continued…
You can also check out the building of my forest painting studio shed on this page.